Today’s homes require sophistication control in its different gadgets which are basically electronic appliances. This has revolutionized the area of home automation with respect to an increased level of affordability and simplicity through the integration of home appliances with smart phone and tablet connectivity. Smart phones are already feature-perfect and can be made to communicate to any other devices in an adhoc network with a connectivity options like Bluetooth . With the advent of mobile phones, Mobile applications development has seen a major outbreak. Utilizing the opportunity of automating tasks for a smart home, mobile phone commonly found in normal household can be joined in a temporary network inside a home with the electronic equipments. Android, by Google Inc. provides the platform for the development of the mobile applications for the Android devices . Home automation system is a mobile application developed using Android targeting its vast market which will be beneficial for the masses. According to the International Data Corporation (IDC) Worldwide Quarterly Mobile Phone Tracker, Android maintained its leadership position in global market share . Bluetooth is a short-range wireless communication technology that comes in handy as the solution while communicating over an ad hoc network environment like the home environment for connecting the home appliances with the mobile phones. Bluetooth works over 2.4 GHz frequency range up to the range of 100 m with 1 Mbps speed, providing a safe and efficient solution for controlling home automation .
SYSTEM ARCHITECTURE
The Home Automation System (HAS) was developed using Arduino IDE and C++ and a User Interfaced (UI) Android Application program implemented on an Android based Bluetooth enabled mobile phone, and an 8 bit microcontroller based relay driver circuit with Serial Bluetooth Module, which is able to communicate with the Home–Appliances over Bluetooth link. The system is based on serial data transmission using Bluetooth wireless communication in order to facilitate the appliances control in a HAS. This system ensures a secured exchange of data on wireless communication. It also supports conventional ON/OFF system of appliances. A user interface (UI) on the Android enabled mobile phone offers system connection and control utilities. ULN 2803 relay driver and Serial Bluetooth Module as well as Arduino IDE for compiling C Language Code a were used for the development. An ATMEL 89C51, 8 bit microcontroller was used as an embedded relay controller.
DEVELOPMENT PLATFORM
This section describes the technologies used for developing the mobile phone application of the Home Automation System. The mobile phone application development presented in this paper is based on the following technologies: Android, Bluetooth. Android is a platform developing and deploying android based applications on mobile devices supporting it. Bluetooth has its own benchmark as a wireless communication technology for permanent and itinerant devices. Combining the power of Bluetooth, the best known and used wireless technology for short range communication provide a facility to create Android based mobile applications using the Bluetooth Wireless Technology. The Android Bluetooth specification, added in API level5 of Android APIs.
- Android
Android is everywhere. Present days Phones, Tablets, TVs and set-top boxes powered by Google TV. Soon, Android will be in cars, in in-flight entertainment systems on planes, and even in robots.
Android was originally created b y Andy Rubin as an operating system for mobile phones, around the dawn of this twenty-first century. In 2005, Google acquired Android Inc., and made Andy Rubin the Director of Mobile Platforms for Google. Many think the acquisition was largely in response to the emergence of the Apple iPhone around that time; however, there were enough other large players, such as RIM Blackberry, Nokia Symbian, and Microsoft Windows Mobile, that it seemed a salient business decision for Google to purchase the talent and intellectual property necessary to assert the company into this emerging space, which has become known as Internet 2.0.
Android applications are written in the Java programming language. The Android SDK provides tools for code compilation and packaging data and resource files into an archive file with ‘.apk’ extension called as an Android package. Android devices used the ‘.apk’ file to install t he application. Android’s application framework allows for the creation of extremely feature rich and novel applications by using a set of reusable components.
The amalgamation of the Android development environment with the Bluetooth wireless technology is known by Android’s support for the Bluetooth network stack, which permits a device to wirelessly exchange data with another Bluetooth device. The application framework enables access to the Bluetooth functionality using the Android Bluetooth APIs. These APIs allow wireless applications to connect to other Bluetooth devices for point-to-point and multipoint wireless features.
Using the Bluetooth APIs, an Android application can carry out the following functions:
- Scrutinize for other Bluetooth devices
- Enquire about the local Bluetooth adapter for paired Bluetooth devices
- Establish the RFCOMM channels
- Connect to other devices through service discovery
- Exchange data to and from other devices
- Administer multiple connections
Android had unique support for Bluetooth in Android-powered devices including: Classic Bluetooth for more battery-intensive operations such as streaming and communicating and with low power requirements, Android 4.3 (API Level 18) introduces API support for Bluetooth Low Energy.
- Bluetooth
The Bluetooth profile used in Home Automation System (HAS) Android mobile phone application is the Bluetooth Serial Port Profile (btspp). RFCOMM is a connection-oriented protocol. It provides streaming communication between the devices. The btspp profile and RFCOMM protocol are used in the application to access the serial port and communicate using streaming data. All of the Bluetooth APIs is available in the android.bluetooth package.
Home Automation System Application is developed using Android platform for mobile phones and tablets with Android support having the Bluetooth connectivity option. Android devices have almost covered a larger pie in the market, hence keeping in mind its popularity; this application can prove to be a boon for those users longing to make their house – an automated home. Home appliances can be controlled using this interactive application within their home environment easily. Application is based on expandable list view and it controls the ON/OFF using Bluetooth connectivity. Expandable list view is used to group list data by categories like Living room , Bed room, Kitchen, Guest room, Store and Porch. It has the capability of expanding and collapsing the groups when user touches header .
BLUETOOTH CONNECTIVITY
Home Automation System Application has the capability of expandable list view is used to exchange the ASCII data with HAS circuit through Bluetooth facility of mobile phone when user touches header. The Android platform comprises of the Bluetooth network stack. This allows a device to wirelessly exchange data with other Bluetooth devices. The application framework then provides access to the Blue tooth functionality with the help of the Android Bluetooth APIs. These APIs make the applications to connect wirelessly to other Bluetooth devices, for point-to-point and multipoint wireless features.
- The Bluetooth APIs
All of the Bluetooth APIs’ are available in the Android Bluetooth package. The following is the overview of the classes needed during the application’s development .
- BluetoothAdapter: Represents the local Bluetooth adapter (Bluetooth radio)
- BluetoothDevice: Represents a remote Bluetooth device, to query information such as its name, address, class, and bonding state.
- BluetoothSocket: Represents the interface for a Bluetooth socket (similar to a TCP Socket).
- BluetoothClass: Describes the general characteristics and capabilities of a Bluetooth device.
- Bluetooth Permissions
In order to use Bluetooth features in an Android application, at least one of two Bluetooth permissions: BLUETOOTH and BLUETOOTH_ADMIN are needed to be declared.
We declared the Bluetooth permission(s) in our application’s AndroidManifest.xml as below:
<manifest … >
<uses-permission android:name=”android.permission.BLUETOOTH” /> <uses-permission android:name=”android.permission.BLUETOOTH_ADMIN” />
</manifest>
- Methods for Bluetooth connectivity
Normally, before commencing communication, devices can use two methods for initiating communication with each other which can be done normally either by discovering other nearby devices to detect the address and services that are provided by other devices or by knowing the device address beforehand and directly using that address for further communication process. In Home Appliance Control, the later method is used.
1) The Discovery method:
The devices participating in the communication process must be set to the discovery mode.
2) The Known Address method:
The communication with a known remote device is helpful in faster communication as the discovery time is avoided. In this automation system, the appliances would be already known to the Bluetooth module as and when required. It is established in the following manner:
- a) SPP
SPP (Serial Port Profile) in the Bluetooth profiles is implemented as the Bluetooth Serial Port Profile. Bluetooth profiles are the implementation of the Bluetooth protocols in full or partial manner as defined and adopted by the Bluetooth SIG. They reside over the Bluetooth protocol stack for their full or partial support. The implementation hence uses the support of Bluetooth Serial Port Profile and RFCOMM protocol which is a connection-oriented protocol for Radio Frequency Communication, the replacement for the RS-232 cable to provide serial emulation.
- b) MAC Address
Bluetooth devices have a 12 hexadecimal digit MAC address which is to be known beforehand.
A complete specification for the connectivity in Home Appliance Control is done using the Known Method as follows:
The entire setup described here includes the completion of these important steps using all classes and interfaces of the Android Bluetooth APIs available in the android.bluetooth package.
Bluetooth verification and enabling process
- Check for Bluetooth support
- This can be accomplished by using the BluetoothAdapter in the application which serves as an entry point to all Bluetooth interactions. There is only one adapter for entire system and it represents the devices’ Bluetooth radio (adapter). If it is null the device does not have Bluetooth support.
- Enable Bluetooth
- Check to make sure it is turned on in the application itself. Otherwise, request the user to turn on Bluetooth
without leaving the application.
Then there are two cases: first, if Bluetooth is not turned ON,
Step three: Establish the connection.
- After obtaining the BluetoothDevice object that represents the remote device, it is used to get the BluetoothSocket and initiate the connection by creating the insecure ‘rfcomm socket’ to service record by passing the SPP UUID to it that is hard coded before.
Step four: Create a data stream.
- The data stream helps to send message to the remote device, here, this helps to talk to the appliances finally in the Home Appliance Control application.
The Android emulator does not emulate Bluetooth so real devices were used for basic program testing and final implementation.
MICROCONTROLLER AT89C51 PROGRAM
The program for the microcontroller is written in C and compiled using Arduino IDE to generate hex code. The generated hex code is burnt into the microcontroller using a C Flash+ programmer. The microcontroller port pins are defined using ‘sbit’ function for interfacing with the surrounding peripherals.
By selecting device from list menu of Home Automation Application program which is developed using Android installed on mobile device, will transmit ASCII characters serially through Bluetooth and on the receiving side microcontroller receives data through serial Bluetooth module on serial port of microcontroller AT89C51. ‘SBUF register’ will read this ASCII characters as equivalent HEX value which will be ported to Port 0, 1, and 2’s pins of AT89C51.
For operating Relay1 in ON condition, one has to select item ‘Light 1 ON’ of list menu ‘Living Room’ means ASCII character “A” will be transmit and microcontroller will receive equivalent value in HEX through SBUF register which is “0x41” through Bluetooth serial m odule which makes ‘pin 1 of Port 0’ high and for ma king Relay1 in OFF condition simply select ‘Light 1 OFF’ item o f ‘Living Room’ list menu means ASCII character ‘a’ will be transmit, microcontroller will receive equivalent value in HEX through SBUF register which is “0x61” w hich makes ‘pin 1 of Port 0’ low. Same way you can ON and OFF relay connected to Port 0, 1 and 2.
IMPLEMENTATION
Power up the Circuit and scan the Bluetooth devices on your Mobile Device. If everything’s done correctly you will be able to find a Bluetooth device. You will be asked for a pairing code in case of the above model is 1234 but it might be different if you are using a Bluetooth module from another vendor. Follow the steps for operating devices listed in program.
- Start Bluetooth connection of your mobile phone.
- Open the ‘HAS’ application on your Android mobile phone.
- Select connect device from opt ion menu using scan for new devices.
- ‘Bluetooth Serial Module will b e available under ‘select a device to connect’ list.
- Pair ‘Bluetooth Serial Module’ by providing pair co de ‘1234’.
- Start selecting particular device for making ‘ON/OFF’ from List Menu, you will see relay ON and OFF according to combination.
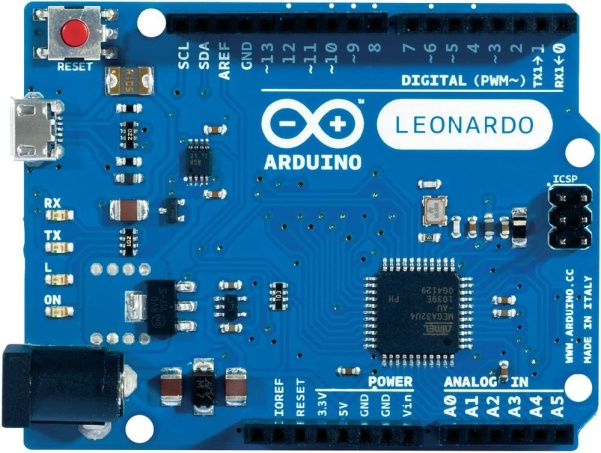
Arduino
Arduino is a popular open-source single-board microcontroller, descendant of the open source Wiring platform, designed to make the process of using electronics in multidisciplinary projects more accessible. The hardware consists of a simple open hardware design for the Arduino board with an Atmel AVR processor and onboard input/output support. The software consists of a standard programming language compiler and the boot loader that runs on the board.
Basic Functions of Arduino Uno:
The setup() function is called when a sketch starts. Use it to initialize variables, pin modes, start using libraries, etc. The setup function will only run once, after each power up or reset of the Arduino board.
After creating a setup() function, the loop() function does precisely what its name suggests, and loops consecutively, allowing your program to change and respond as it runs. Code in the loop() section of your sketch is used to actively control the Arduino board. The code below won’t actually do anything, but it’s structure is useful for copying and pasting to get you started on any sketch of your own. It also shows you how to make comments in your code.
Any line that starts with two slashes (//) will not be read by the compiler, so you can write anything you want after it. Commenting your code like this can be particularly helpful in explaining, both to yourself and others, how your program functions step by step.
void setup() {
// put your setup code here, to run once: }
void loop() {
// put your main code here, to run repeatedly: }
setup()§
The setup() function is called when a sketch starts. Use it to initialize variables, pin modes, start using libraries, etc. The setup function will only run once, after each power up or reset of the Arduino board.
loop()§
After creating a setup() function, which initializes and sets the initial values, the loop() function does precisely what its name suggests, and loops consecutively, allowing your program to change and respond. Use it to actively control the Arduino board
The Arduino IDE is a cross-platform application written in Java, and is derived from the IDE for the Processing programming language and the Wiring project. It is designed to introduce programming to artists and other newcomers unfamiliar with software development. It includes a code editor with features such as syntax highlighting, brace matching, and automatic indentation, and is also capable of compiling and uploading programs to the board with a single click. There is typically no need to edit make files or run programs on a command-line interface. Although building on command-line is possible if required with some third-party tools such as Ino.
The Arduino IDE comes with a C/C++ library called “Wiring” (from the project of the same name), which makes many common input/output operations much easier. Arduino programs are written in C/C++, although users only need define two functions to make a runnable program:
setup() – a function run once at the start of a program that can initialize settings§
loop() – a function called repeatedly until the board powers off§